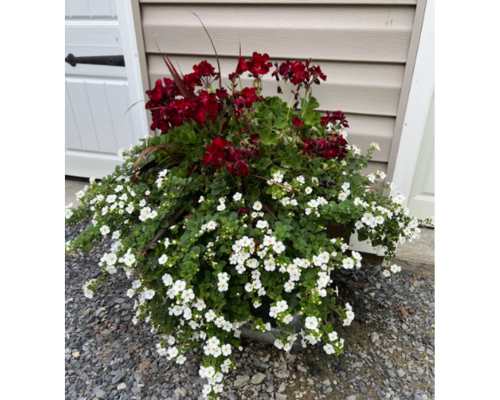
Easy Build of a Self-Watering Planter.

During the summer, we’re often on the move, camping and visiting our grandkids in two different states. I’ve always wanted vibrant flowering planters, but with our frequent absences during the scorching summer months, maintaining them becomes a challenge. That’s where DIY self-watering planters came to the rescue.
I’ve bought store-bought self-watering containers before and was disappointed with the limited water capacity. With this DIY build, you can customize the water reservoir to be as deep as you prefer.
As an Amazon Associate I earn from qualifying purchases.
During my research, I stumbled upon a brilliant YouTube video by Pretty Purple Door Garden Design. The video showed me how to easily build my own self-watering planters using any container. Here’s the link to the video: https://youtu.be/cjwVDqUp5qw?si=x1gky-eCjwKv8SQR.
I was impressed by the simplicity of the build and the straightforward “build, dump water in, and go” process. Above are photos of my end results. What I particularly love about the design is the PVC pipe base—it should last forever. If the container eventually erodes, I can simply move the PVC base into a new container and continue gardening. Plus, what’s great is that none of the pvc pipe parts are glued together, making it incredibly easy to twist the pieces apart and adjust the pipe length as needed.
Here are the materials I used to build my self-watering container:
- Container without any drainage holes. I recommend you purchase a deep container. Note: Apply a bead of silicone caulk or sealant to cover the drainage holes from the inside of the planter. This will create a watertight seal. Amazon Link to 18″ pot: https://amzn.to/3xCFn6z and Amazon Link to Silicone: https://amzn.to/3UffIcP
- Cover to prevent dirt from falling into the water at the base. I used a piece of linoleum flooring cut to the width of the container. Feel free to use whatever material you have on hand.
- 2 Plastic Party Cups. Amazon Link: https://amzn.to/3VFaUyu
PVC Pipe and Fittings:
- PVC Pipe: You can use any width size, as long as the fittings match the size of your pipe. 1/2″ Amazon Link: https://amzn.to/49fCXrw
- PVC Cross Fitting: Quantity – 1 Size: 1/2″ Amazon Link: https://amzn.to/3IQCL7g
- PVC Tee Fitting: Quantity – 4 Size: 1/2″ Amazon Link: https://amzn.to/3Vz0hNR
Optional: I had a black container and wanted the PVC pipe, where you pour the water into the base, to blend in with the container. So, I used black spray paint on the upper portion of the pipe. You can see it in the photos above. Amazon Link: https://amzn.to/4asTjht
For tools, you will need to cut the PVC pipe to length. You can use a hacksaw or a pipe cutter. Assure the pipe cutter will cut the size the PVC Pipe you chose. This one cuts pipe up to 2.5″. Amazon Link: https://amzn.to/4a9Jgy3
Instructions: 1. Follow the PVC Pipe Base photo above. Cut and push ends together. However long you make the legs is how deep your water reservoir will be. 2. Then you will need a way for the water to wick into the top portion of the soil. I used two plastic cups and used a nail to poke holes all over it. Then pack dirt tightly into the cup. As tight as you can get it. 3. Cut two holes into your lineloeum base material. One for the wicking cup, you created above. Assure it will sit deep into the bottom reservoir water by cutting a circular hole into your lineloeum base material. Two, cut a hole for the long PVC pipe you will use to pour the water from the top after planting your water or veggie plants. Note to cut the bottom of the pvc pipe that will be touching the bottom of the container at a slant so the water will be able to recede into the bottom reservoir. 4. Add water down the corner long PVC pipe to fill the bottom reservoir and fill your container with soil and plants. 5. Sit back and enjoy your beautiful plants.
