I LOVE THE TIMELESS APPEAL OF A WOODEN SHELF!
As an Amazon Associate I earn from qualifying purchases.
Affection for these rustic storage solutions runs deep. Wooden shelves often evoke feelings of coziness, and craftsmanship for something I made. I love seeing the rustic knots and patterns from the tree where it was cut. I recently stepped into my new home with lots of framed photos of my two son’s families and 6 grandkids that I wanted to hang on the walls . So, I’m staring at these fresh, clean walls and all I can think about is how many holes I’d have to make. Honestly, I’m not a fan of patching every time I decide to move a frame from here to there. That was when I decided shelving was the answer. I would make it large enough to place framed photos and decorate with home decor.
If I made them myself, I could customize the size and finish to my liking. But I am not a master woodworker. Can I do this? No way to know until you try.
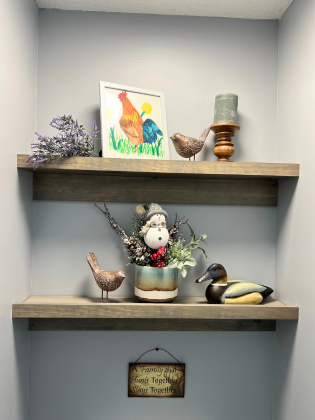
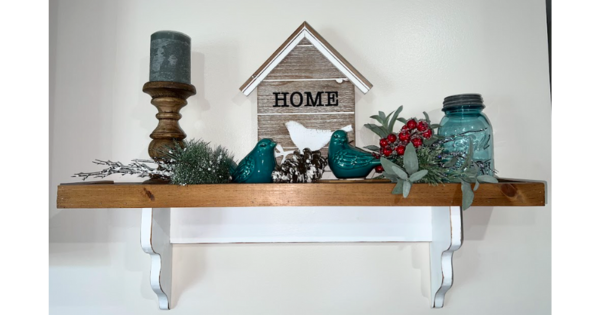
So I came up with a simple design and away I went. Here are the results. I decided to stain the top portion, allowing the natural grain to shine through, and paint the bottom portion to match the trim throughout the house. To merge these two elements, I subtly distressed the edges of the painted boards and to achieve a harmonious transition between the stained and painted sections, I lightly applied stain using a corner of a rag along the distressed edges, which married the two together. If you like stain, then stain, if you like paint, then paint. Do what makes you happy.
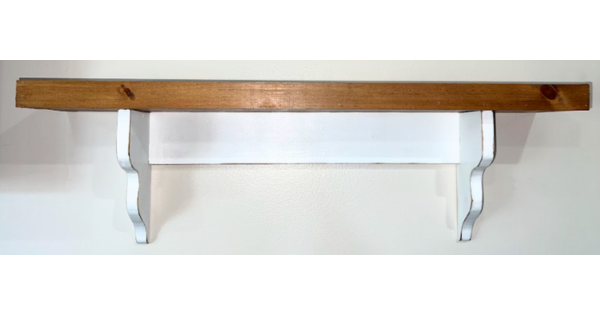
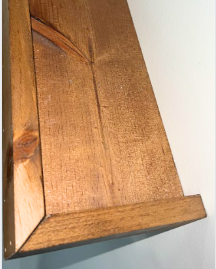
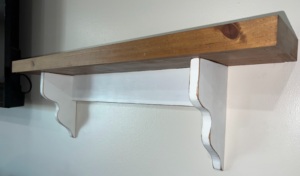
Materials, Paint, Stain,Tools list and Corbel pattern I used are below.
I wanted to add a lip to it so items would not fall off. After doing so, the appearance suggests a thickness of 1.5 inches for the shelf supporting the items; but this is not the case and I like the chunky shelf look. Refer to Photos above.
Planning Your Design:
Before you start cutting, decide on the dimensions of your shelf and corbels, as well as size of wood you wish to use for your project. I would recommend sketching your design on paper, including measurements for the shelf and the shape of the corbels. Bear in mind that a 1x6x12 board is actual size: 0.75-in x 5.5-in x 12-ft and a 1x4x12 is actual size: 0.75-in x 3.5-in x 12-ft. I purchased “unfinished” for boards I wanted to stain and “primed” with white paint for the boards I planned to paint. This will save you a step of not having to prime before final coats of finishing paint.
Type of Wood:
I chose pine boards which have worked great. But you may decide to use a harder wood, such as oak, maple, or cherry which are excellent choices as well.
Cutting the (stained portions) of the Shelf:
Time to cut the boards to the length you have chosen. I used a board size of: 1x6x12 for the flat portion of the shelf the items would be sitting on .
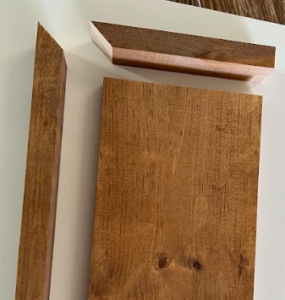
Outside lip: I then cut the outside lip with board size 1x2x12 by cutting the corners on the outer lip to be 45 degree angles (see image below.) Caution-Safety first: Use eye protection: safety goggles and ear protection and be very careful to keep all parts of your body from any blade you are using during this project.
Mitre Cut:
Begin by marking the point on your wooden board where you want the 45-degree angle to start. Adjust the angle of the saw blade to 45 degrees by loosening the bevel adjustment and rotating the saw blade until it aligns with the 45-degree mark on the saw’s angle gauge. Once you’ve set the angle, place your wooden board against the fence of the miter saw, ensuring it is securely held in place. Align your mark with the saw blade, taking care to maintain a firm grip on the wood. Activate the saw and slowly lower the blade to make the cut, ensuring a smooth and steady motion throughout. After cutting, you’ll have two pieces of wood with 45-degree angles.
Cutting the painted portions of the shelf:
I used 1x4x12 primed boards under the shelf (cut to your desired length) with a straight cut.
Creating the Corbels:
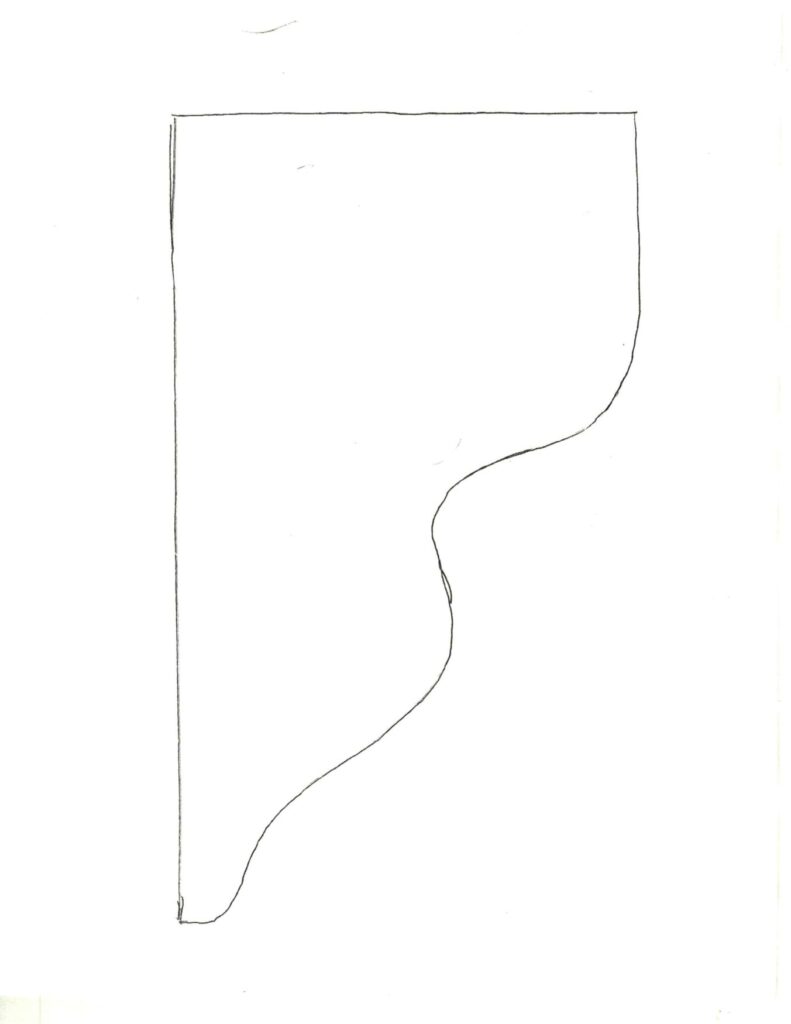
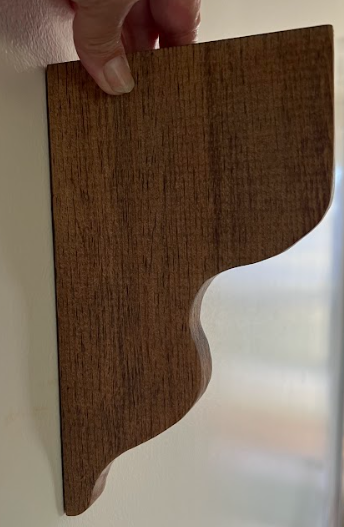
Pattern I used is below. To save the pattern to your computer so you can print: “ right mouse click” on the pattern image below and select “Save as” from the context menu that appears. This original pattern was to be printed on standard printing paper size: 8.5″x11″. If you wish to increase or decrease the size, you can do so easily on a copier.
Now, let’s focus on crafting the corbels. I used primed 1x6x12 for the corbels. Start by tracing the desired shape of the corbel onto the wood using a pencil. This could be a traditional scroll design, a simple curved shape, or something more intricate based on your preference. I have provided a pattern below you are welcome to use. You have the option to enhance the wooden corbel by incorporating various types of moldings.
With the corbel shape marked on the wood, carefully maneuver the wood through the bandsaw. Ensure you maintain a steady hand and follow the marked lines closely to achieve the desired shape. Remember to always prioritize safety by wearing your safety goggles and other protective gear. I used the top of the corbel (using factory edge, rather than cutting the edge) so I would assure I tight fit (board to board.)
Refining the Corbels:
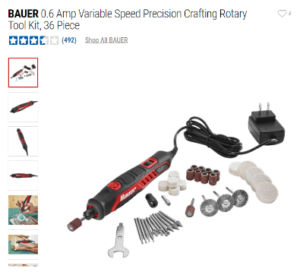
Once you’ve cut out the corbel shapes, use sandpaper to refine the edges and smooth any rough spots. I used the following tool from Harbor Freight called a “Rotary Tool”. You will notice round barrel pieces that are covered in sand paper to sand the pine wood smooth. This made the smoothing process very easy.
Stain and Paint before assembly:
If you wish to stain, here are the materials I used.
For the stained boards:
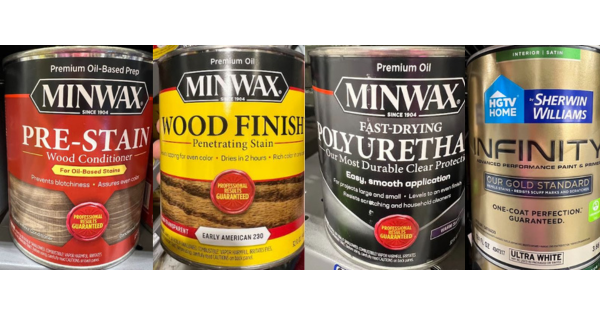
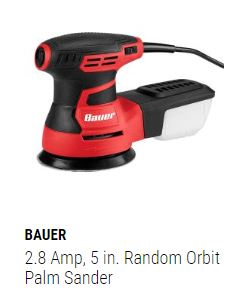
I sanded with palm sander. Wiped off sanding dust. Applied pre-stain, then stain and then polyurethane. Here are the stain colors I used. Instructions on how to use the products can be found on the back of the can.
Pre-stain: Minwax Pre-stain Conditioner (Oil Based Prep) It penetrates the grain of the wood to promote uniform acceptance of oil-based stains.
Stain: Minwax (Oil) in shade: Early American 230
Poly: Minwax (Oil) Polyurethane (follow instructions on back of can.)
For the painted boards:
Paint: Sherwin Williams (water based) Comes in “Ultra White” and I did not add any colorant to it. Finish I Used was : Satin
For the edges of the painted white boards, I gently ran 220 grit sandpaper over all the edges, and dipped a small amount of stain on the corner of the rag and gently ran it over the wood that was now raw again from the sanding until it looked the way I liked.
Assembly:
To attach all pieces of the shelf: I used wood glue first then used a brad nailer attached to the air compressor. Size of nails were: 18 gauge 1.5” For the mitered edges, after applying the wood glue, I firmly pressed them together, ensuring a tight fit. For added strength, I also used a nail gun.
Apply wood glue to the backside of the corbels and carefully attach them to the underside of the shelf. Use clamps to hold the corbels in place while the glue dries, insuring a secure bond.
Supplies:
1x6x12 Unfinished pine boards
1x2x8 Unfinished pine boards
1x6x12 Primed pine board (already primed with white paint for you)
1x4x12 Primed pine board
Sandpaper (grits I used):
For Pine: start with #120 and finish with no finer than #220 (for water base stains) and 180 grit for oil base stains.
Wood Glue
Measuring Tape
Pencil
Safety Equipment: Safety Goggles, ear protection, etc.
Finishes:
For the stained boards:
For all the following products, instructions are on the back of the can.
Pre-stain: Minwax Pre-stain Conditioner (Oil Based Prep)
Stain: Minwax (Oil) in shade: Early American 230
Poly: Minwax (Oil) Polyurethane This is a clear sealant—to enhance the natural beauty of the wood and protect it from wear and tear.
For the painted boards:
Paint: Sherwin Williams (water based) Comes in “Ultra White” and I did not add any colorant to it. Finish I Used was : Satin
Tools:
Compound Miter Saw
Nail Gun
Bandsaw
Brand Nailer with nail size: 18 gauge 1.5”
Air Compressor (to use with nail gun)
Rotary Tool with sanding wheel
Palm Sander (can choose to sand by hand. Sandpaper blocks as well as hseets of sandpaper will work as well.)
Sandpaper- varying grit sizes 120-220
Clamps of varying sizes if you choose to clamp any piece.


Corbel Pattern I used is below. To save the pattern to your computer so you can print: “ right mouse click” on the pattern image below and select “Save as” from the context menu that appears. This original pattern was to be printed on standard printing paper size: 8.5″x11″. If you wish to increase or decrease the size, you can do so easily on a copier. Cut it out. Outline pattern with a pencil onto 1x6x12 wood and cut it out with a bandsaw. You could aslo clamp the wood down to working surface and use a jigsaw to cut it out. I sanded it with the rotary tool above with sandpaper drums (that comes with it.) You could also hand sand with sanding block or for tight curves wrap sandpaper around a circular object such as a pencil.
